Virtual Classroom

Sunday, April 10, 2022

Explore Clay Day


Exploring Clay

Artists have made art out of clay for a very long time, and have made many different kinds of objects using their hands to pinch, pull, poke and smooth the clay.


How can you use your hands to change the shape of clay?


  1. Distribute Clay 
  2. Students explore squeezing, poking, and pinching and pulling the clay.
  3. Questions/Observations:
    How is clay similar/different than play-doh?
    Compare how it looks, feels, and smells.

Part II. Making and Joining forms


  1. Demonstrate how to make a few simple forms
  2. Show students how to temporarily join the forms by pressing the clay together.
  3. Have students make an object. 


 https://www.youtube.com/watch?v=IWU8Nf2vbZk


Tuesday, April 5, 2022

Air Dry Clay-AMI Day


AMI Day Kindergarten Art Lesson- Air Dry Clay


 2 Ingredient Air Dry Clay


Artists are very creative people and can come up with lots of ways to make art, even if they don't have a lot of supplies!
Have you ever used something that isn't an art supply to make art? Maybe cardboard, masking tape, a sock, leaves...

This week we can explore that idea by making our very own clay! The best part is it only uses 2 ingredients that many people have at home, Flour and Hair Conditioner. Watch this video...


Recipe:
1/2 cup Flour (or cornstarch)
4 Tbl. Hair conditioner (or lotion)

If you enjoyed this activity, there are many other recipes for making clay. I found several by doing a google search for 'air dry clay recipes'. 


Tuesday, March 29, 2022

Wednesday, March 16, 2022

Explore Sewing

All over the world, you will find people sewing.
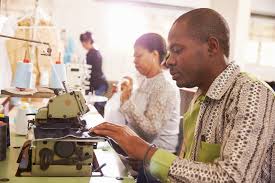


People sew to create useful objects like clothes, blankets and shoes.


People sew to create beautiful objects like rugs, quilts and toys.


Sewing can be useful AND beautiful.

Today we are going to explore sewing in three stations.

We can explore some fabric we use for sewing, called BURLAP

We can explore the string we use for sewing called YARN

We can try to tie a knot, a skill we will need to learn for sewing.


Video:


Pulling burlap apart

This fabric is called burlap. It is a good fabric to begin to learn how to sew on because it is easy to see the holes. Fabric is made from thread woven together in a pattern. Sometimes the fabric has a tight weave and it is hard to see the threads. Sometimes fabric has a loose weave and you can see the individual threads that make up the fabric. Burlap has a loose weave. Lets try to take apart the burlap so we can learn how the fabric is made, and it's fun!

Pull a piece of thread off the edge of the burlap. Pull another. Can you pull a thread from the middle of the fabric? As you pull the threads, place them in your basket.


Snipping yarn

Yarn is the thread we will use for sewing. Yarn can come in many exciting colors and textures. Sweaters and blankets are often made from yarn.

We are going to practice snipping yarn. We should learn to cut the yarn not too close to the hole where the yarn comes out, or the yarn will disappear. If that happens to you, you can open the jar and thread it back through the hole in the lid.

It is fun to snip yarn. 

As you snip yarn, collect the pieces in your basket.


Tying Knots

Knots are important to learn for many sewing projects. A knot stops your stitches from pulling out. Learning how to tie may also help you with other things like tying shoes.

Lay the rope out flat. 

Bring the two ends up and cross

Take the tip of the rope on top and bring it down through the hole. 

Pull tight.

Untie it and try it again. Make sure you leave it untied for the next person.

If you can tie a know using the rope, you may want to try tying many knots in a piece of yarn.


Tuesday, February 22, 2022

Found Object Portraits AMI Day

 Found Object Plate Portraits 

original lesson from youngschoolart@blogspot.com


 This is my cat Breyer posing with the found object portrait I made- Mrs. Junge


Back in December each one of you created a self-portrait, or a picture of yourself. 
For this project, we are going to make a portrait, the face of someone else! 

Here are the steps: 

1. Pick a plate- Could be a ceramic, plastic, or paper plate.

2. Collect some supplies from around your house, including small toys, kitchen items, craft supplies, office supplies, or foods. 

3. Identify parts of the face and sort objects into categories such as eyes, mouths, noses, etc. 

4. Create a portrait using the objects. Move items around to make different faces, have fun with it!

5. Put items back where they belong. 

more examples:
photos by George Isamar,
an art teacher in Puerto Rico.